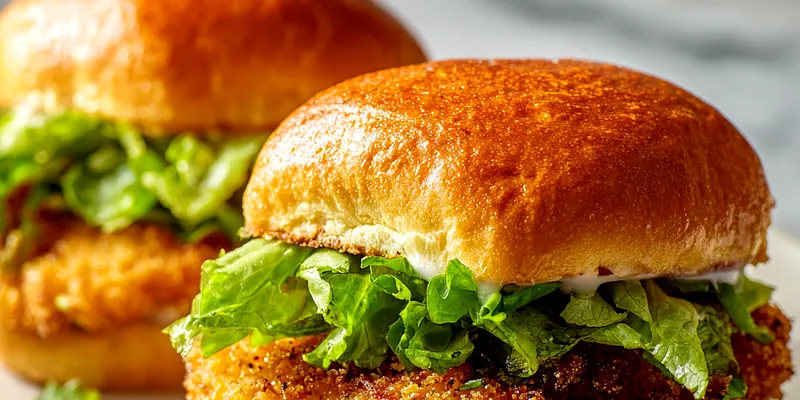
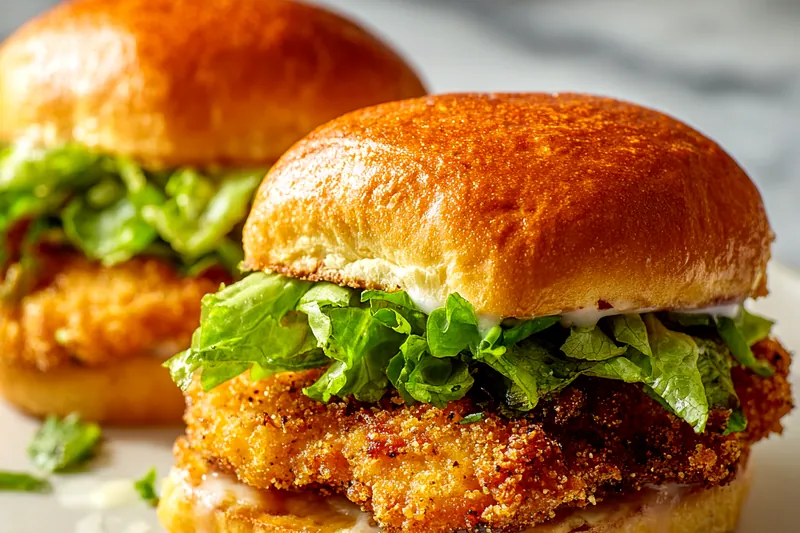
Ultimate Crispy Chicken Sandwich
This crispy chicken sandwich rivals any restaurant version with its perfectly seasoned, ultra-crunchy coating that stays crispy bite after bite. The secret is in the double-dip technique and buttermilk marinade that keeps the chicken incredibly juicy inside while achieving that satisfying golden crunch outside. Ready in just 30 minutes, this sandwich is about to become your new favorite homemade meal.

The Secret to Extra Crispy Coating
The foundation of an exceptional crispy chicken sandwich lies in the breading technique. A double-dip method creates multiple layers of texture that result in that signature crunch. The buttermilk marinade serves a dual purpose: it tenderizes the chicken through its natural acidity while providing moisture that helps the breading adhere perfectly. Unlike plain milk, buttermilk's thick consistency clings to the chicken, creating a better base for the flour coating.
Temperature control is absolutely critical for achieving crispy perfection. Oil that's too hot will burn the coating before the chicken cooks through, while oil that's too cool results in greasy, soggy breading. Using a thermometer to maintain 350°F ensures the coating crisps up beautifully while the chicken stays juicy inside. The panko breadcrumbs provide superior crunch compared to regular breadcrumbs because their larger, airier structure creates more surface area that crisps in the hot oil.
💡 Professional Tip
Let the breaded chicken rest on a wire rack for 5 minutes before frying - this allows the coating to set and adhere better, significantly reducing the risk of the breading falling off during cooking.
Frequently Asked Questions
You can bread the chicken up to 4 hours in advance and keep it refrigerated on a wire rack. The marinating in buttermilk can be done overnight for even more tender results. However, for maximum crispiness, fry the chicken just before serving. If you must prepare ahead, reheat breaded chicken in a 400°F oven for 10 minutes to restore crispiness rather than microwaving.
Make your own buttermilk substitute by adding 2 tablespoons of white vinegar or lemon juice to 2 cups of regular milk and letting it sit for 10 minutes until it thickens and curdles. Plain yogurt thinned with a little milk also works well. While these substitutes work, real buttermilk produces the most tender results due to its unique culture and acidity.
Yes, you can bake at 425°F for 20-25 minutes, flipping halfway through. Spray the breaded chicken generously with cooking spray before baking and once after flipping to help achieve crispiness. While baking is healthier and easier, it won't produce quite the same golden crunch as frying. For best results, use a wire rack on your baking sheet to allow air circulation.
Vegetable oil, canola oil, or peanut oil are ideal because they have high smoke points and neutral flavors that won't compete with the seasonings. Avoid olive oil as it has a lower smoke point and can impart a strong flavor. You need enough oil to come about halfway up the chicken (roughly 1/2 inch deep in your skillet) for even frying and proper heat distribution.
The most reliable method is using an instant-read thermometer - chicken is safely cooked at 165°F in the thickest part. Visually, the coating should be deep golden brown, and when you press the chicken, it should feel firm with clear juices. The coating should sound crispy when tapped. If you cut into it, the meat should be white throughout with no pink, but try to avoid cutting as it releases precious juices.
Classic pairings include crispy french fries, sweet potato fries, coleslaw, or a simple side salad. Pickles are essential for cutting through the richness. For a complete Southern-style meal, add mac and cheese or potato salad. Corn on the cob or roasted vegetables make lighter accompaniments. Don't forget extra sauce for dipping!
Absolutely! Increase the cayenne pepper to 2 teaspoons in the flour mixture, or add hot sauce to the buttermilk marinade. For Nashville hot chicken style, brush the fried chicken with a mixture of melted butter and cayenne pepper before assembling. Add sliced jalapeños or pepper jack cheese for extra heat. Adjust the sriracha in the sauce to your preferred spice level.
Store leftover fried chicken separately from buns in an airtight container in the refrigerator for up to 3 days. Reheat in a 375°F oven for 10-15 minutes to restore crispiness - never microwave as it makes the coating soggy. The sauce can be refrigerated for up to a week. If you have leftover assembled sandwiches, disassemble them before storing as the moisture from toppings will soften the breading.
Recipe Troubleshooting Guide
Coating Falls Off During Frying
Problem: The breading separates from the chicken and floats off in the oil, leaving patches of bare meat.
Solution: This happens when the coating isn't properly adhered. Make sure chicken is thoroughly coated in flour before dipping in buttermilk - the flour creates a sticky base. Press the panko firmly onto the chicken and let it rest for 5 minutes before frying. Also ensure your oil is at the correct temperature (350°F) - too hot causes rapid expansion that breaks the coating.
Chicken is Raw Inside
Problem: The outside looks perfectly golden but the inside is still pink or undercooked when you cut into it.
Solution: The oil temperature is too high, cooking the exterior too quickly. Reduce heat to maintain 350°F and use a thermometer to monitor. Pound chicken to an even 1/2-inch thickness so it cooks uniformly. If the coating is browning too fast, reduce heat and consider finishing in a 350°F oven for 5-8 minutes to cook through without burning.
Breading is Soggy
Problem: The coating doesn't achieve a crispy texture and feels soft or greasy instead of crunchy.
Prevention: Your oil temperature is too low, causing the chicken to absorb excess oil. Maintain 350°F throughout cooking. Don't overcrowd the pan - fry in batches if needed to maintain oil temperature. Always drain on paper towels or a wire rack, never a plate. Use panko instead of regular breadcrumbs for superior crunch.
Chicken is Dry
Problem: The chicken breast is overcooked and lacks juiciness despite the crispy exterior.
Recovery: Don't skip the buttermilk marinade - it's essential for moisture. Marinate for at least 30 minutes and up to 4 hours. Use an instant-read thermometer and remove chicken immediately at 165°F - carryover cooking will bring it to 170°F. Avoid overcooking by watching timing carefully (6-7 minutes per side). Starting with evenly pounded chicken ensures uniform cooking.
Coating is Too Thick
Problem: The breading layer is excessively thick, creating a doughy texture or not cooking through properly.
Prevention: Shake off excess flour and buttermilk between each coating step. Don't press too hard when applying the panko - a single even layer is sufficient. If you accidentally create too thick a coating, gently press and pat it down rather than adding more. Let excess buttermilk drip back into the bowl before dredging in flour.
Flavor Balance Issues
Too Sweet: If buns are too sweet, switch to standard hamburger buns or potato rolls instead of brioche. Balance sweetness with extra pickles or a squeeze of lemon juice in the sauce.
Too Salty: If too salty, reduce salt in the breading mixture and ensure you're not using salted buttermilk. Rinse chicken before marinating if it was pre-brined. Use unsalted butter for toasting buns.
Bland: If lacking flavor, increase seasonings in the flour mixture, especially garlic powder and paprika. Add hot sauce to the buttermilk marinade. Season chicken with a light sprinkle of salt before breading. Ensure your spices are fresh.
Selecting Quality Ingredients
Choosing the right chicken makes all the difference in this recipe. Look for chicken breasts that are similar in size for even cooking, ideally 6-8 ounces each. Organic or free-range chicken tends to have better flavor and texture, though standard chicken works well too. The key is ensuring they're evenly thick - use a meat mallet to pound them to a uniform 1/2 inch thickness so they cook at the same rate and don't end up with overcooked thin parts and undercooked thick sections.
Fresh, quality buttermilk creates the best marinade. Look for buttermilk with a thick, creamy consistency rather than watery varieties. For the breading, panko breadcrumbs are non-negotiable - their larger, flakier texture creates dramatically more crunch than regular breadcrumbs. Japanese-style panko works best. When it comes to buns, brioche offers the perfect balance of softness and richness, but they should be fresh and slightly sweet. Always toast your buns to add another layer of texture and prevent them from getting soggy.
Essential Ingredient Notes
- Buttermilk: Use full-fat buttermilk for maximum tenderizing effect and flavor. The acidity breaks down proteins making the chicken incredibly tender, while the thickness helps breading adhere. Store-bought works perfectly, but if making your own substitute, let it sit for a full 10 minutes to develop the right consistency.
- Panko Breadcrumbs: Japanese-style panko creates superior crunch due to its light, airy structure. Look for regular panko, not whole wheat, as it crisps better. If you can only find regular breadcrumbs, pulse them lightly in a food processor to create larger, irregular pieces that mimic panko's texture.
- Brioche Buns: Choose fresh, soft brioche buns with a slightly sweet flavor and golden color. They should give slightly when pressed but bounce back. Avoid buns with visible tears or dry edges. If brioche isn't available, potato buns make an excellent substitute with similar softness and subtle sweetness.

Mastering the Frying Technique
Proper frying technique is what separates good crispy chicken from exceptional crispy chicken. The oil depth matters - you want about 1/2 inch in your skillet, enough to come halfway up the chicken for even heat distribution without requiring excessive oil. A heavy-bottomed cast-iron or stainless steel skillet maintains temperature better than thin pans. Never crowd the pan; frying too many pieces at once drops the oil temperature dramatically, resulting in greasy, soggy coating instead of crispy perfection.
Temperature management requires constant attention. Start with oil at 350°F, verified with a thermometer. When you add chicken, the temperature will drop 25-30 degrees - that's normal. Adjust the heat to bring it back to 350°F and maintain it there. Listen for a steady, gentle sizzle - if it's roaring, your heat is too high; if it's barely bubbling, it's too low. Don't flip the chicken more than once; let each side develop its golden crust undisturbed for 6-7 minutes before turning.
The Double-Dip Breading Method
This professional technique creates exceptional crunch and adherence. First, coat chicken in seasoned flour - this creates a dry base. Dip in buttermilk which clings to the flour. Finally, press into panko breadcrumbs. The flour layer acts as glue between the moist chicken and final crispy coating. Some chefs do flour-buttermilk-flour-buttermilk-panko for even more layers, but our streamlined method delivers excellent results without excess coating. The 5-minute rest after breading lets everything set, dramatically reducing coating loss during frying.
Ultimate Crispy Chicken Sandwich
📋 Ingredients
For the Chicken
- 1/2 cup mayonnaiseUse full-fat mayo for best flavor and consistency
- 2 tablespoons sriracha sauceAdjust amount to your preferred spice level
- 1 teaspoon lemon juiceAdds brightness and balances richness
For Assembly
- 4 boneless, skinless chicken breasts (6-8 oz each)Pound to even 1/2-inch thickness for uniform cooking
- 2 cups buttermilkFull-fat works best; tenderizes and adds flavor
- 1 1/2 cups all-purpose flourCreates the base layer for breading adhesion
- 1 1/2 cups panko breadcrumbsJapanese-style for maximum crunch
- 2 teaspoons paprikaAdds color and subtle sweet pepper flavor
- 1 1/2 teaspoons garlic powderNot garlic salt - we control salt separately
- 1 teaspoon onion powderEnhances savory depth
- 1 teaspoon cayenne pepperAdjust for preferred heat level
- 2 teaspoons salt, divided1 tsp for marinade, 1 tsp for breading
- 1 teaspoon black pepperFreshly ground tastes best
- Vegetable oil for fryingNeed about 2 cups for 1/2 inch depth
- 4 brioche bunsFresh and soft; toast before serving
- Lettuce leavesIceberg or romaine for crunch
- Dill pickle slicesEssential for cutting richness
Instructions
Prepare the Chicken
Pound chicken breasts to even 1/2-inch thickness using a meat mallet between plastic wrap or parchment paper. Place in a large bowl or zip-top bag with buttermilk and 1 teaspoon salt. Turn to coat completely. Cover and refrigerate for at least 30 minutes, or up to 4 hours for maximum tenderness. The buttermilk's acidity will break down proteins, making the chicken incredibly tender.
Set Up Breading Station
Set up three shallow dishes. In the first, combine flour with paprika, garlic powder, onion powder, cayenne pepper, remaining 1 teaspoon salt, and black pepper. Whisk to distribute seasonings evenly. In the second dish, add the reserved buttermilk from marinating. In the third, place panko breadcrumbs mixed with a pinch of salt. Remove chicken from buttermilk, letting excess drip off but keeping chicken moist.
Bread the Chicken
Working with one piece at a time, dredge chicken thoroughly in seasoned flour, coating all sides and shaking off excess. Dip back into buttermilk, letting excess drip off. Finally, press firmly into panko breadcrumbs, ensuring even coating on all surfaces. Place breaded chicken on a wire rack and let rest for 5 minutes - this crucial step helps the coating adhere and prevents it from falling off during frying.
Fry to Perfection
Heat 1/2 inch of vegetable oil in a large, heavy-bottomed skillet over medium-high heat until it reaches 350°F on a thermometer. Carefully add chicken breasts without crowding (work in batches if needed). Fry for 6-7 minutes per side until deep golden brown and internal temperature reaches 165°F. Maintain oil temperature at 350°F throughout cooking. Transfer to paper towels or wire rack to drain for 2 minutes.
Make Sauce and Assemble
While chicken drains, whisk together mayonnaise and sriracha until smooth and creamy. Toast brioche buns cut-side down in a dry skillet or under the broiler until golden brown, about 1-2 minutes. Spread spicy mayo generously on both bun halves. Place crisp lettuce leaves on bottom bun, add hot crispy chicken breast, top with pickle slices, and crown with top bun. Press gently and serve immediately while chicken is hot and crispy.
Recipe Notes & Tips
Storage
Store leftover fried chicken separately from buns in an airtight container in the refrigerator for up to 3 days. Reheat in a 375°F oven for 10-15 minutes to restore crispiness - never microwave as it makes the coating soggy. The spicy mayo sauce can be made ahead and refrigerated for up to one week. For best quality, assemble sandwiches fresh rather than storing assembled.
Serving Suggestions
Serve with classic french fries, sweet potato fries, or crispy onion rings. Add a side of creamy coleslaw or simple green salad to balance the richness. Extra pickles and hot sauce on the side are always welcome. For a complete meal, include corn on the cob or mac and cheese. The spicy mayo also makes an excellent dipping sauce for fries.
Variations
For Nashville hot chicken style, brush fried chicken with melted butter mixed with cayenne pepper. Make it buffalo-style by tossing in buffalo sauce after frying. Add cheese (pepper jack, cheddar, or Swiss) in the last minute of cooking. Try different sauces: ranch, honey mustard, chipotle mayo, or garlic aioli. For extra crunch, add a thin layer of crushed cornflakes to the panko.