Homemade Glazed Donuts
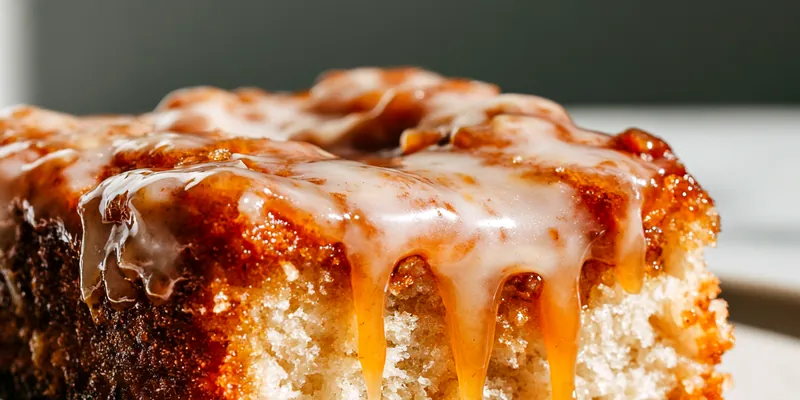
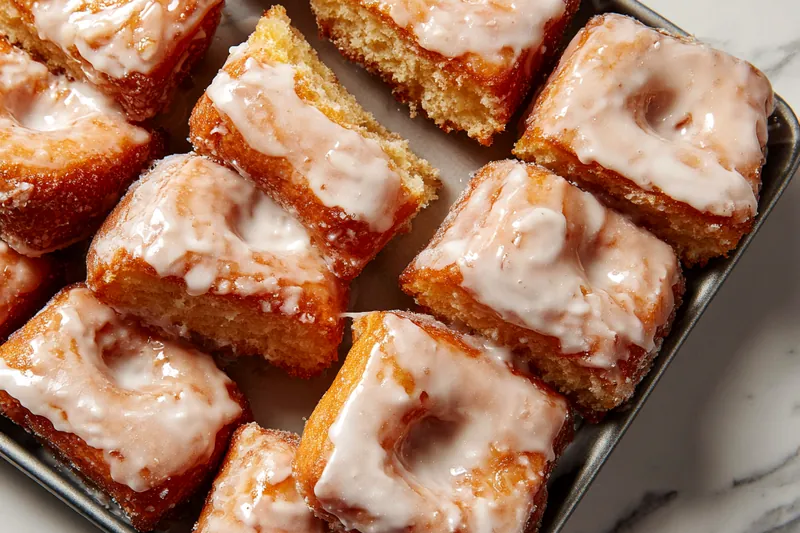
These homemade glazed donuts are incredibly light, fluffy, and tender with a sweet vanilla glaze that sets perfectly. Making donuts from scratch is easier than you think, and the results are far superior to any store-bought version. Perfect for weekend mornings, special occasions, or whenever you're craving a fresh, warm donut.

The Art of Perfect Donuts
Making homemade donuts is a rewarding process that combines the science of yeast baking with the art of frying. The key to achieving that signature fluffy texture lies in proper dough development and temperature control. When you work with yeast dough, you're nurturing living organisms that create the air pockets responsible for that light, airy crumb. The dough should be soft and slightly tacky but not sticky, which allows it to rise beautifully while maintaining its structure during frying.
Temperature is crucial at every stage of donut making. Your milk should be warm but not hot when activating the yeast, the oil must maintain a steady temperature while frying, and the donuts should be slightly warm when glazing for the best coating. Many home cooks struggle with dense or greasy donuts, but these issues are almost always related to incorrect oil temperature or overworking the dough. With practice and attention to these details, you'll be making bakery-quality donuts in your own kitchen.
💡 Professional Tip
Use a thermometer to monitor your oil temperature throughout frying. If the oil is too cool, donuts absorb excess grease and become heavy. If too hot, they brown too quickly on the outside while remaining raw inside. Maintaining 350°F is the sweet spot for perfectly cooked donuts.
Frequently Asked Questions
Donut dough can be prepared through the first rise, then refrigerated overnight for up to 24 hours. The cold fermentation actually develops more flavor. In the morning, let the dough come to room temperature for 30 minutes before rolling and cutting. Alternatively, you can fry the donuts and freeze them unglazed for up to 2 months, then thaw, warm slightly, and glaze before serving.
While you can bake these donuts at 375°F for 10-12 minutes, the texture will be more cake-like than the traditional light, fried donut texture. Baked donuts also tend to dry out faster. If you prefer baking, I recommend brushing them with melted butter immediately after baking to help keep them moist, then glazing as directed in the recipe.
Vegetable oil, canola oil, or peanut oil work best for frying donuts due to their high smoke points and neutral flavors. Avoid olive oil or butter, as they burn at lower temperatures. You'll need enough oil to allow donuts to float freely, typically 2-3 inches deep in your pot. The oil can be strained and reused 2-3 times if stored properly in an airtight container.
If your dough isn't rising, the yeast may be dead or the environment may be too cold. Check your yeast's expiration date and ensure your milk is the right temperature (110°F feels warm but not hot to the touch). The rising environment should be draft-free and warm, ideally 75-80°F. Try placing the bowl in an oven with just the light on, or near a warm stovetop.
Donuts are ready when they're deep golden brown on both sides, which typically takes 1-2 minutes per side at 350°F. They should float to the surface quickly and puff up. If you're unsure, remove one and cut it in half to check - the interior should be cooked through with no raw dough. Using a thermometer to maintain consistent oil temperature ensures even cooking.
Glazed donuts pair beautifully with hot coffee, cold milk, or fresh fruit juice for breakfast. For a special brunch, serve them alongside fresh berries, whipped cream, and hot chocolate. They're also wonderful with tea, especially chai or Earl Grey. For kids' parties, set up a donut decorating station with various glazes, sprinkles, and toppings.
Absolutely! The basic glaze recipe is very versatile. For chocolate glaze, add 3 tablespoons cocoa powder. For maple glaze, replace vanilla with maple extract and use maple syrup instead of some of the milk. Citrus glazes work wonderfully with lemon or orange zest and juice. You can also add food coloring or espresso powder for different variations.
Store glazed donuts in an airtight container at room temperature for up to 2 days. They're best enjoyed fresh, but day-old donuts can be refreshed by warming in a 300°F oven for 3-5 minutes. Don't refrigerate them, as this accelerates staling. For longer storage, freeze unglazed donuts in a freezer bag for up to 2 months, then thaw and glaze when ready to serve.
Recipe Troubleshooting Guide
Donuts Are Too Dense
Problem: Your finished donuts are heavy and compact instead of light and fluffy.
Solution: Dense donuts usually result from insufficient rising time or overworked dough. Make sure your dough doubles in size during both rises - this can take longer in cool environments. Also, avoid adding too much flour when rolling out the dough, as this toughens the texture. Knead just until the dough is smooth and elastic, not beyond.
Donuts Are Greasy
Problem: The donuts absorbed too much oil and taste heavy or greasy.
Solution: This happens when the frying oil is too cool, causing donuts to absorb excess oil before they cook through. Always use a thermometer and maintain 350°F. If your oil temperature drops after adding donuts, wait for it to recover before adding more. Also ensure donuts are properly proofed before frying - underproofed donuts absorb more oil.
Glaze Won't Set
Problem: The glaze stays runny and drips off the donuts instead of setting.
Prevention: Your glaze may be too thin or the donuts too hot. Add more powdered sugar to thicken the glaze to a honey-like consistency. Let donuts cool for 3-5 minutes after frying before glazing - they should be warm but not hot. If glaze is still too thin, whisk in additional powdered sugar one tablespoon at a time until it reaches the right consistency.
Donuts Are Burning Outside But Raw Inside
Problem: The exterior browns too quickly while the interior remains undercooked.
Recovery: Your oil temperature is too high. Reduce heat and let it stabilize at 350°F before continuing. Also check that your donuts aren't rolled too thick - they should be about 1/2 inch thick for even cooking. If they're thicker, they'll need lower heat and longer cooking time, which can lead to burning before the center cooks.
Dough Is Too Sticky to Work With
Problem: The dough sticks to everything and is difficult to roll and cut.
Prevention: Lightly flour your work surface and rolling pin, but avoid adding too much additional flour as this makes donuts tough. If the dough is very sticky, it may need a few more minutes of kneading or a bit more flour in the initial mix. You can also chill the dough for 15-20 minutes to make it easier to handle. Use a well-floured donut cutter and tap it on the counter to release cut donuts.
Flavor Balance Issues
Too Sweet: If donuts taste overly sweet, reduce the sugar in the glaze by 1/4 cup or add a pinch of salt to balance. You can also make a lighter glaze by thinning it more with milk.
Too Salty: Too much salt in the dough can make donuts taste off. Follow measurements carefully - 1 teaspoon is enough for this batch size. You can't fix salty dough, but a sweeter glaze can help balance it.
Bland: If donuts taste bland, increase the vanilla extract to 1.5 teaspoons in the dough and add a pinch more salt. The nutmeg can also be increased to 3/4 teaspoon for more depth. Ensure your ingredients are fresh for maximum flavor.
Selecting Quality Ingredients for Best Results
The beauty of homemade donuts lies in the simplicity and quality of ingredients. Start with fresh active dry yeast that's within its expiration date - old yeast won't produce the rise needed for fluffy donuts. All-purpose flour with a moderate protein content works perfectly, creating a tender structure without being too cake-like or too chewy. Whole milk adds richness and helps create a softer crumb than skim or low-fat milk would provide.
Don't skimp on the vanilla extract - use pure vanilla rather than imitation for the best flavor. The small amount of nutmeg in the dough adds warmth and complexity without being identifiable as nutmeg, which is traditional in classic raised donuts. Fresh eggs at room temperature incorporate more easily into the dough and create better structure. For the glaze, powdered sugar (also called confectioners' sugar) dissolves completely, creating a smooth, glossy finish that regular granulated sugar cannot achieve.
Essential Ingredient Notes
- Active Dry Yeast: Check the expiration date and proof your yeast in warm milk before adding other ingredients. If it doesn't foam after 5 minutes, your yeast is dead and needs to be replaced. Store yeast in the refrigerator after opening to extend its life. Instant yeast can be substituted in equal amounts and doesn't need to be proofed first.
- All-Purpose Flour: Measure flour by spooning it into your measuring cup and leveling off, rather than scooping directly from the bag, which packs it down and adds too much flour. Too much flour results in tough, dense donuts. If you live at high altitude, you may need to reduce flour slightly. The dough should be soft and slightly tacky.
- Whole Milk: Temperature matters - use a thermometer to ensure milk is 110°F when proofing yeast. Too hot kills the yeast, too cold won't activate it. Whole milk creates the richest flavor, but 2% milk can work in a pinch. Avoid skim milk as it lacks the fat needed for tender donuts. You can also use buttermilk for a slight tang.

Mastering the Frying Technique
Frying donuts requires attention and patience, but the technique is straightforward once you understand the principles. The key is maintaining consistent oil temperature at 350°F throughout the process. Use a heavy-bottomed pot or Dutch oven that retains heat well, and fill it with at least 2-3 inches of oil. A deeper pot is safer and allows better temperature control. Never fill the pot more than halfway with oil to prevent dangerous spillovers.
Work in small batches of 2-3 donuts at a time to avoid crowding and temperature drops. When you add cold dough to hot oil, the temperature naturally decreases, so wait between batches for it to recover. Flip donuts only once - when the bottom is deep golden brown and the donut naturally releases from the bottom of the pot. Over-handling during frying can deflate the delicate structure. Proper drainage is also important, so use paper towels or a wire rack to remove excess oil immediately after frying.
Temperature Control During Frying
The single most important factor in perfect donuts is maintaining 350°F oil temperature. Too low (below 340°F) and donuts become greasy and heavy. Too high (above 365°F) and they burn outside while staying raw inside. Invest in a candy or deep-fry thermometer and clip it to the side of your pot. Check it frequently and adjust heat as needed. Some temperature drop is normal when adding donuts, so slightly increase heat just before adding each batch, then reduce once they're in the oil.
Homemade Glazed Donuts
📋 Ingredients
Dough Ingredients
- 2 cups powdered sugarSifted for smoothest glaze
- 1/4 cup whole milkAdjust for desired consistency
- 1/2 teaspoon vanilla extractUse pure vanilla for best flavor
Glaze Ingredients
- 3 1/4 cups all-purpose flourPlus more for dusting work surface
- 1/4 cup granulated sugarFeeds the yeast and adds sweetness
- 2 1/4 teaspoons active dry yeastOne standard packet, check expiration
- 1 teaspoon saltEnhances flavor and controls yeast
- 1/2 teaspoon ground nutmegTraditional spice for classic flavor
- 3/4 cup whole milkWarmed to 110°F for yeast activation
- 1/4 cup unsalted butter, meltedAdds richness and tender texture
- 2 large eggs, room temperatureCreates structure and richness
- 1 teaspoon vanilla extractPure vanilla for authentic flavor
- 8 cups vegetable oil for fryingOr enough for 2-3 inches depth
Instructions
Make the Dough
In a large mixing bowl, combine warm milk and yeast. Let sit for 5 minutes until foamy. Add sugar, melted butter, eggs, and vanilla extract. Mix well. Gradually add flour, salt, and nutmeg, mixing until a soft dough forms. Knead on a floured surface for 5-7 minutes until smooth and elastic.
First Rise
Place dough in a greased bowl, cover with a damp towel, and let rise in a warm place for 1-1.5 hours until doubled in size. The dough should spring back slowly when pressed.
Shape and Cut
Punch down the dough and roll out on a floured surface to 1/2-inch thickness. Cut donuts using a 3-inch donut cutter or two round cutters (one large, one small for the center). Place on parchment-lined baking sheets, cover, and let rise for 30 minutes.
Fry the Donuts
Heat oil in a deep pot or fryer to 350°F. Carefully add 2-3 donuts at a time, frying for 1-2 minutes per side until golden brown. Remove with a slotted spoon and drain on paper towels.
Make the Glaze
Whisk together powdered sugar, milk, and vanilla extract until smooth. The glaze should be thick but pourable. If too thick, add milk one teaspoon at a time.
Glaze and Serve
While donuts are still slightly warm, dip the top of each donut into the glaze, allowing excess to drip off. Place on a wire rack for glaze to set, about 5-10 minutes. Serve fresh and enjoy!
Recipe Notes & Tips
Storage
Store glazed donuts in an airtight container at room temperature for up to 2 days. Best enjoyed fresh on day of making. Unglazed donuts can be frozen for up to 2 months, then thawed and glazed before serving.
Serving Suggestions
Serve warm with coffee, hot chocolate, or cold milk. Perfect for breakfast gatherings, brunch parties, or weekend treats. Can be served alongside fresh fruit for a complete breakfast spread.
Variations
Try different glazes like chocolate, maple, or strawberry. Add sprinkles, chopped nuts, or shredded coconut while glaze is wet. Fill with custard, jelly, or cream using a piping bag for filled donuts. Replace nutmeg with cinnamon for different spice profile.