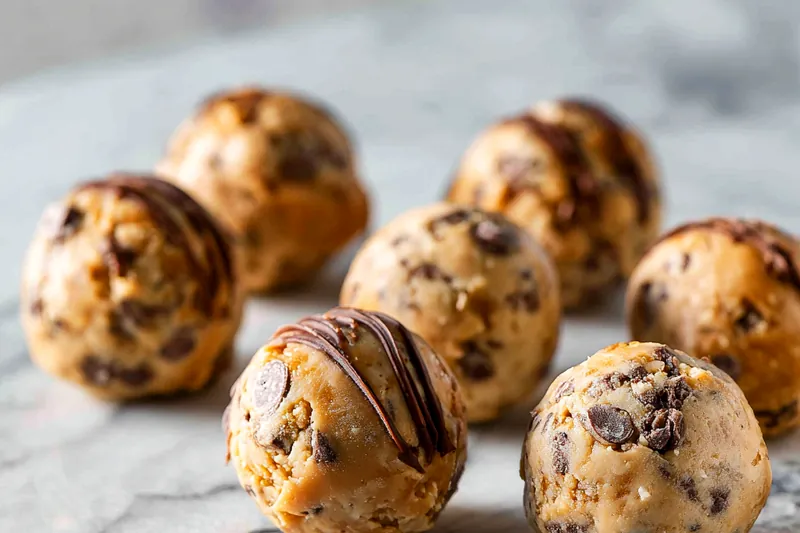
High Protein Frozen Peanut Butter Yogurt Bites
These High Protein Frozen Peanut Butter Yogurt Bites are a delightful and nutritious snack option. Perfect for satisfying your sweet cravings while packing a protein punch. Easy to make and customizable, they are a hit among both kids and adults!


Why This High Protein Frozen Peanut Butter Yogurt Bites Recipe Works
These yogurt bites combine high protein Greek yogurt with creamy peanut butter, making them not only filling but also nutritious. The addition of honey adds sweetness while still keeping it healthy. This balance of protein, fat, and carbs makes them a perfect snack.
The versatility of this recipe allows for customized ingredients like nuts and chocolate, enhancing both flavor and texture. They can satisfy sweet cravings without the guilt. Plus, they are easy to prepare ahead of time, making them a convenient choice for busy lifestyles.
💡 Professional Tip
For a creamier texture, allow the yogurt to sit at room temperature for a few minutes before serving. You can also experiment with different nut butters like almond or cashew for varied flavors.
Frequently Asked Questions
Absolutely! These yogurt bites can be made several days in advance and stored in the freezer. They’re perfect for meal prep and can be enjoyed anytime you need a quick snack.
You can use regular yogurt or dairy-free yogurt alternatives like almond or coconut yogurt. Just keep in mind that this might alter the protein content slightly.
These bites are done once they are completely frozen, which typically takes about 4 hours. They should feel firm to the touch when fully set.
Yes, these yogurt bites are meant to be frozen. They can last up to 2 months in the freezer when stored properly in an airtight container.
You will need mixing bowls, a spoon or spatula, and ice cube trays or silicone molds for shaping the yogurt bites. A freezer is essential for setting them.
These bites can be enjoyed on their own but pair perfectly with fresh fruits or smoothies for a complete snack. They also go well with a cup of yogurt or cottage cheese for extra protein.
This recipe doesn’t include spice, but you can add a pinch of cinnamon or nutmeg for added warmth. Adjust the sweetness to your taste by varying the amount of honey or maple syrup.
Store any leftover yogurt bites in an airtight container in the freezer. They can last for up to 2 months, ensuring you have a healthy snack ready whenever you need it.
Recipe Troubleshooting Guide
Too Dry
Problem: If your yogurt bites are too dry, it may be due to overmixing or too much yogurt.
Solution: Add a little extra peanut butter or yogurt to the mixture to give it a creamier texture before freezing.
Uneven Freezing
Problem: If some bites are frozen solid while others are soft, it could be due to uneven filling in the molds.
Solution: Ensure that the mixture is evenly distributed in each mold. You can also rotate the trays halfway through freezing if your freezer has hot spots.
Lacking Flavor
Problem: If the bites taste bland, it may be due to insufficient sweetener or peanut butter.
Prevention: Add more honey or peanut butter to enhance the flavor. A pinch of salt can also help to balance sweetness and improve taste.
Wrong Texture
Problem: If the texture is too hard, they might have been frozen too long or at too low a temperature.
Recovery: Let the bites sit at room temperature for a few minutes before serving to soften. Adjust the freezing time for next time if needed.
Overcooked
Problem: While these bites are frozen, over-mixing can lead to a tough texture.
Prevention: Mix until just combined and avoid overworking the ingredients to maintain a soft bite.
Flavor Balance
Too Sweet: If the bites are too sweet, reduce the amount of honey or syrup next time.
Too Salty: If they're too salty, consider using unsalted nuts or peanut butter in the mixture.
Bland: To fix blandness, increase the flavoring ingredients like vanilla or try adding spices like cinnamon.
Choosing the Best Ingredients
Using high-quality Greek yogurt is essential for achieving creamy, protein-packed bites. Opt for natural peanut butter without added sugars for a healthier option. Additionally, fresh ingredients like nuts can enhance the flavor and texture significantly.
When selecting honey or maple syrup, choose pure versions to avoid artificial additives. This will ensure that your snack remains wholesome. Don’t hesitate to customize the mix-ins according to your taste preferences!
Essential Ingredient Notes
- Greek Yogurt: Choose full-fat Greek yogurt for a creamy texture and rich flavor. Low-fat options can work, but may affect the creaminess of the bites.
- Peanut Butter: Select natural peanut butter that contains only peanuts and salt for the best health benefits. Avoid brands with added sugars or hydrogenated oils.
- Honey: Opt for raw or local honey for a more complex flavor. Maple syrup is a great alternative for a vegan option that also adds a unique sweetness.
Cooking Technique Tips
Mix all ingredients gently to maintain a smooth and creamy consistency. Avoid overmixing to prevent the yogurt from becoming too stiff. Storing them properly will also help in maintaining their texture.
For best results, use silicone molds for easy removal. You can also experiment with layering different flavors or adding fruit purees for a unique twist on the traditional bite.
Chef's Secret Technique
For a variety in flavor, try adding a dash of cinnamon or nutmeg to the mixture. This subtle change can enhance the overall taste profile of the bites.
High Protein Frozen Peanut Butter Yogurt Bites
📋 Ingredients
For the Base:
- 1 cup Greek yogurt💡 Full-fat yields the creamiest texture.
- 1/2 cup natural peanut butter💡 Use unsweetened for a healthier option.
For the Mix-ins:
- 2 tablespoons honey or maple syrup💡 Adjust sweetness to your preference.
- 1 teaspoon vanilla extract💡 Enhances flavor profile significantly.
Instructions
Step 1: Prepare Ingredients
In a medium bowl, mix the Greek yogurt and peanut butter until smooth. This combination provides a creamy base that's rich in protein.
Step 2: Add Flavorings
Add honey or maple syrup and vanilla extract to the mixture. Stir well to incorporate all the flavors.
Step 3: Mix in Extras
Fold in the chopped nuts and mini chocolate chips or raisins. These ingredients add texture and an extra flavor boost.
Step 4: Fill Molds
Spoon the mixture into ice cube trays or silicone molds. Make sure to fill them evenly for uniform bites.
Step 5: Freezing
Place the trays in the freezer and allow them to freeze for at least 4 hours. This will ensure they hold their shape.
Step 6: Remove Bites
Once frozen, carefully remove the yogurt bites from the trays. They can be pushed out easily if using silicone molds.
Step 7: Store Bites
Store the frozen bites in a zip-top bag or airtight container. This keeps them fresh for your snacking needs.
Step 8: Enjoy!
Enjoy them straight from the freezer or let them thaw for a few minutes before eating for a softer texture.
Recipe Notes & Tips
Storage
These bites can be stored in the freezer for up to two months. Ensure they are in an airtight container to prevent freezer burn.
Serving Suggestions
These bites pair wonderfully with fresh fruit or yogurt. They make a great addition to smoothie bowls or can be enjoyed on their own.
Variations
Feel free to experiment with different nut butters or add in dried fruits for a unique twist. You can also layer flavors by adding fruit purees into the mixture.