Garlic Parmesan Cheeseburger Bombs: Deliciously Stuffed Bites
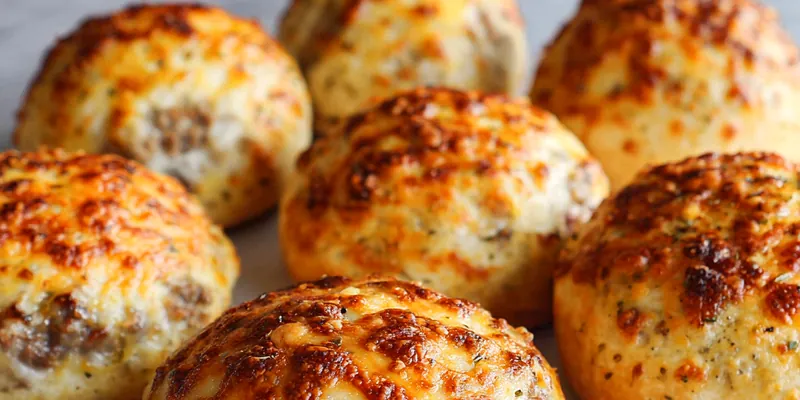
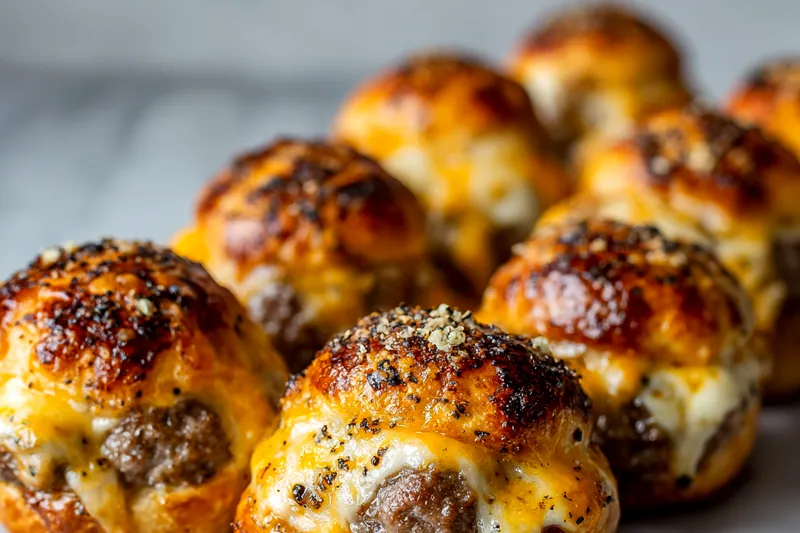
Garlic Parmesan Cheeseburger Bombs are the ultimate party pleaser! These bite-sized delights combine savory meat with gooey cheese, all wrapped in buttery dough. Perfect as an appetizer or game day snack, they're sure to impress your guests.

Why This Garlic Parmesan Cheeseburger Bombs Recipe Works
The key to perfect cheeseburger bombs lies in the balance between the rich filling and the fluffy dough. Cooking the beef with garlic and onion enhances the flavor profile, ensuring a delicious bite every time. The addition of Italian seasoning and cheese makes these bombs irresistible.
The buttery biscuit dough creates a soft shell that complements the savory filling. Each bite bursts with cheesy goodness, making them perfect for snacking or as a party appetizer. These bombs combine familiar flavors in a creative and fun way.
💡 Professional Tip
For extra flavor, consider adding a splash of Worcestershire sauce to the beef mixture. You can also experiment with different cheeses like pepper jack for a spicy kick.
Frequently Asked Questions
Yes, you can prepare the filling a day in advance and refrigerate it. Just assemble and bake the bombs when you are ready to serve.
Ground turkey or chicken can be used as a lighter alternative. Additionally, plant-based ground meat can cater to vegetarian preferences.
The bombs should be golden brown on the outside and the filling should be hot and bubbly. You can check by inserting a thermometer; it should read 165°F (74°C).
Absolutely! Assemble the bombs, then freeze them unbaked. When ready to cook, bake directly from frozen, adding a few extra minutes to the cooking time.
You will need a skillet for cooking the beef, a baking sheet, and parchment paper for easy cleanup. You may also want a mixing bowl for combining ingredients.
These bombs pair perfectly with dipping sauces like ranch, barbecue, or ketchup. Serve alongside a fresh salad or vegetable platter for a balanced spread.
To increase the spice level, add crushed red pepper flakes or diced jalapeños to the beef mixture. Alternatively, use a spicier cheese like pepper jack.
Store any leftovers in an airtight container in the refrigerator for up to 3 days. Reheat in the oven for best results, keeping the texture crisp.
Recipe Troubleshooting Guide
Too Dry
Problem: This can happen if the beef is overcooked or if there isn't enough cheese in the filling.
Solution: To fix this, ensure you don't overcook the beef and consider adding a bit more cheese for moisture.
Uneven Cooking
Problem: If the bombs are unevenly cooked, they might not have been spaced properly on the baking sheet.
Solution: Make sure to leave enough space between each bomb on the baking sheet for even airflow while baking.
Lacking Flavor
Problem: This could be due to under-seasoning the beef or not using fresh ingredients.
Prevention: Always taste your filling before assembling and adjust seasoning as needed. Fresh herbs can also enhance the flavor.
Wrong Texture
Problem: If the bombs are too dense, it may be due to overworking the dough.
Recovery: Handle the dough gently and avoid overmixing to maintain a light and fluffy texture.
Overcooked
Problem: Overcooking can lead to dry bombs and burnt dough.
Prevention: Always monitor the baking time closely and remove them from the oven as soon as they are golden brown.
Flavor Balance
Too Sweet: If they're too sweet, reduce the sugar in the dough or filling.
Too Salty: To counteract excess salt, serve with a mild dipping sauce or add fresh ingredients to balance the flavor.
Bland: Add additional spices or a splash of Worcestershire sauce to enhance the taste.

Choosing the Best Ingredients
Using high-quality ground beef will significantly enhance the flavor of your bombs. Choose freshly ground beef from a reputable source for the best taste and texture. Don't hesitate to experiment with different meats for variety.
Opt for sharp cheddar cheese to add a richer flavor, while Parmesan provides a wonderful depth. Fresh garlic and onions will brighten up the filling, making every bite more savory.
Essential Ingredient Notes
- Ground Beef: Select lean ground beef (80/20) for a juicy texture. Avoid overly fatty blends to prevent greasiness.
- Cheddar Cheese: Sharp cheddar adds more flavor compared to mild cheddar. Grate it fresh for the best melting quality.
- Garlic: Use fresh garlic for a robust flavor. Adjust the amount according to your taste preference.
Cooking Technique Tips
Ensure your beef mixture is well-seasoned and not overcrowded in the pan for even browning. Browning the meat adds depth to the flavor, so take your time. This step is crucial for achieving the perfect filling.
Brushing the bombs with melted butter before baking enhances the golden color and adds richness. Keep an eye on them in the oven to achieve that perfect golden brown finish.
Chef's Secret Technique
Try chilling the assembled bombs for 15 minutes before baking; this helps the dough hold its shape better. Additionally, a sprinkle of garlic powder before baking enhances the flavor even more.
Garlic Parmesan Cheeseburger Bombs: Deliciously Stuffed Bites
📋 Ingredients
For the Filling:
- 1 cup ketchup💡 Great for dipping!
- 1/2 cup ranch dressing💡 Creamy and flavorful!
For the Dough:
- 1 pound ground beef💡 Lean beef for best flavor!
- 1 cup shredded cheddar cheese💡 Use sharp for more flavor!
Instructions
Step 1: Preheat Oven
Preheat your oven to 375°F (190°C) and prepare a baking sheet by lining it with parchment paper.
Step 2: Cook Beef
In a skillet over medium heat, cook the ground beef along with the diced onion and minced garlic until browned, about 5-7 minutes.
Recipe Notes & Tips
Storage
Store leftovers in an airtight container for up to 3 days in the refrigerator. Reheat in the oven to maintain crispiness.
Serving Suggestions
Serve these bombs with a variety of dipping sauces like ketchup, barbecue, or ranch. Pair with a side salad or veggie platter for a balanced meal.
Variations
Feel free to experiment with different cheeses or add spices for extra heat. You can also try using different protein sources like turkey or veggie meat alternatives.