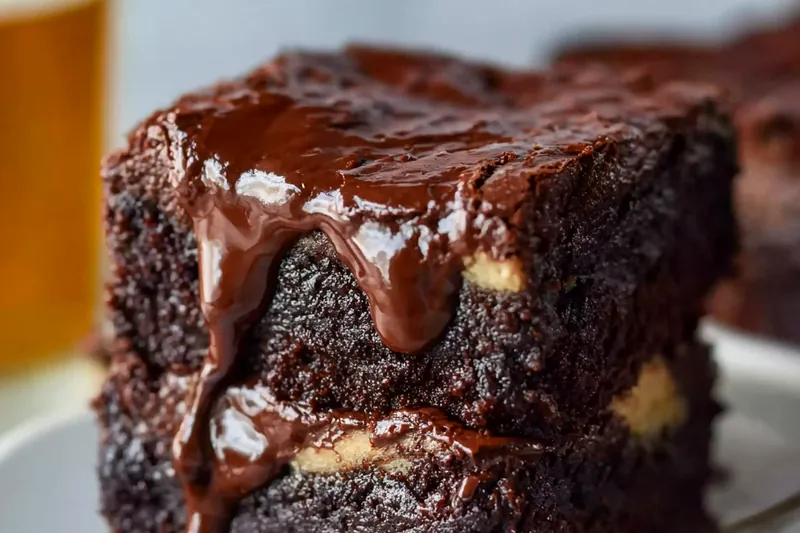
Cream Cheese Swirl Brownies with Chocolate Frosting
These Cream Cheese Swirl Brownies are the ultimate chocolate lover's dream—combining three luxurious layers of pure indulgence. The fudgy brownie base provides that perfect dense, chocolatey foundation, while the tangy cream cheese layer adds a creamy contrast that cuts through the richness. Topped with silky chocolate frosting, each bite delivers an incredible texture and flavor experience that rivals any bakery creation.

The Secret to Perfect Layered Brownies
Creating distinct, beautiful layers in brownies requires understanding the science of batters and how they behave during baking. The key is consistency—your brownie batter should be thick enough to support the cream cheese layer without them blending together, yet fluid enough to spread smoothly. The cream cheese layer must be at the perfect temperature: too cold and it won't spread, too warm and it'll sink into the brownie batter. Room temperature cream cheese beaten until fluffy creates that signature tangy layer that stays put while baking.
Temperature control throughout the process determines your final texture. Starting with properly melted and slightly cooled butter prevents the eggs from cooking when mixed. The cream cheese layer should be spread while the first brownie layer is still slightly warm, creating just enough surface tension to keep the layers separate. Don't overbake—removing the brownies when the center still has a slight jiggle ensures that fudgy texture we're after. The residual heat continues cooking them to perfection as they cool.
💡 Professional Tip
For the cleanest cuts, refrigerate the frosted brownies for at least 2 hours, then use a large sharp knife dipped in hot water and wiped dry between each cut. This technique creates bakery-perfect edges.
Frequently Asked Questions
Absolutely! These brownies actually taste even better the next day as the flavors meld together. You can bake them up to 3 days in advance—just wait to frost them until the day you plan to serve. Store unfrosted brownies tightly wrapped at room temperature or refrigerated. The frosted brownies should be refrigerated in an airtight container and will stay fresh for up to 5 days.
I strongly recommend using full-fat cream cheese for the best results. Low-fat or fat-free versions contain more moisture and stabilizers that can make the layer watery and prevent it from setting properly during baking. The full-fat version provides the rich, tangy flavor and perfect creamy texture that makes these brownies special.
This usually happens when the cream cheese mixture is too thin or warm, or when the bottom brownie layer is too thin. Make sure you're using exactly half the brownie batter for the bottom layer, and beat the cream cheese until it's thick and fluffy before adding the egg. The mixture should hold its shape when dolloped. Also, spread it gently rather than pouring it, and avoid over-mixing once the egg is added.
Yes, these brownies are delicious without frosting too! The cream cheese layer provides plenty of contrast to the chocolate. If you skip the frosting, you might want to dust the top with powdered sugar or cocoa powder for a finished look. However, the frosting does add an extra layer of decadence and helps seal in moisture, keeping the brownies fresh longer.
Look for edges that have pulled slightly away from the pan and appear set, while the center should still have a slight jiggle when you gently shake the pan. A toothpick inserted into the brownie layer (not the cream cheese) should come out with a few moist crumbs—not wet batter, but definitely not clean. Remember, they'll continue cooking as they cool, so slightly underbaking is better than overbaking for that fudgy texture.
These brownies are rich enough to stand alone, but they pair beautifully with a glass of cold milk, hot coffee, or a scoop of vanilla ice cream. For an elegant dessert presentation, serve with fresh raspberries or strawberries—the tartness cuts through the richness perfectly. A dollop of whipped cream adds a light, airy contrast to the dense, fudgy texture.
Definitely! Fold ½ to ¾ cup of chopped walnuts, pecans, or chocolate chips into the brownie batter before layering. Be careful not to add too many mix-ins, as they can interfere with the layering and make cutting difficult. For best results, fold them into the bottom layer only, or sprinkle a few on top of the cream cheese layer before adding the final brownie layer.
Store frosted brownies in an airtight container in the refrigerator for up to 5 days. The cream cheese layer requires refrigeration for food safety. Let them sit at room temperature for 15-20 minutes before serving for the best texture and flavor. You can also freeze unfrosted brownies wrapped tightly in plastic wrap and aluminum foil for up to 3 months. Thaw overnight in the refrigerator before frosting.
Recipe Troubleshooting Guide
Dry or Cakey Brownies
Problem: Your brownies turned out dry and cake-like instead of fudgy and moist.
Solution: This is almost always from overbaking or using too much flour. Check your oven temperature with an oven thermometer—many ovens run hot. Remove the brownies when they still look slightly underdone in the center. Also, measure flour correctly by spooning it into the measuring cup and leveling off, never scooping directly from the bag which compacts it.
Cream Cheese Layer Too Thin
Problem: The cream cheese layer is barely visible or disappeared into the brownie.
Solution: Make sure you're using the full 8 ounces of cream cheese and that it's properly softened (not melted). Beat it until very fluffy before adding other ingredients. When layering, make sure your bottom brownie layer is spread evenly and thick enough. Dollop the cream cheese mixture in several spots, then carefully spread it rather than pouring it all in one spot.
Frosting Too Stiff or Too Runny
Problem: The chocolate frosting won't spread smoothly or is sliding off the brownies.
Prevention: Frosting consistency is all about the cream. If too stiff, add cream one teaspoon at a time, beating well after each addition. If too runny, add more powdered sugar a tablespoon at a time. The butter must be softened but not melted. For best spreading, make sure the brownies are completely cool, and refrigerate the frosted brownies for 30 minutes to set the frosting.
Brownies Stick to Pan
Problem: The brownies won't come out of the pan cleanly or are falling apart.
Recovery: Always line your pan with parchment paper, leaving a 2-inch overhang on two opposite sides to create handles. You can also spray the parchment lightly with cooking spray for extra insurance. Let the brownies cool completely in the pan before attempting to remove them. The cream cheese layer needs time to fully set. If they're still stuck, run a knife around the edges before lifting.
Uneven Layers or Marbling
Problem: The layers aren't distinct or the cream cheese mixed too much with the brownie.
Prevention: Work gently and deliberately when layering. Spread the bottom brownie layer completely to the edges before adding cream cheese. When adding the top brownie layer, drop spoonfuls over the cream cheese layer first, then very gently spread. Don't use a back-and-forth motion which creates mixing. If you want some marbling, use a knife to swirl once or twice—more than that will muddy the layers.
Flavor Balance Issues
Too Sweet: If brownies taste too sweet, reduce the sugar in the brownie layer by ¼ cup, or increase the cocoa powder by 2 tablespoons for a more intense chocolate flavor that balances the sweetness.
Too Salty: If there's too much salt flavor, reduce the salt to ¼ teaspoon in future batches. Use unsalted butter throughout the recipe to control sodium levels.
Bland: If the chocolate flavor isn't strong enough, use a higher-quality cocoa powder (Dutch-processed creates richer flavor), add 1 teaspoon of espresso powder to the brownie batter, or use dark chocolate chips melted into the batter.
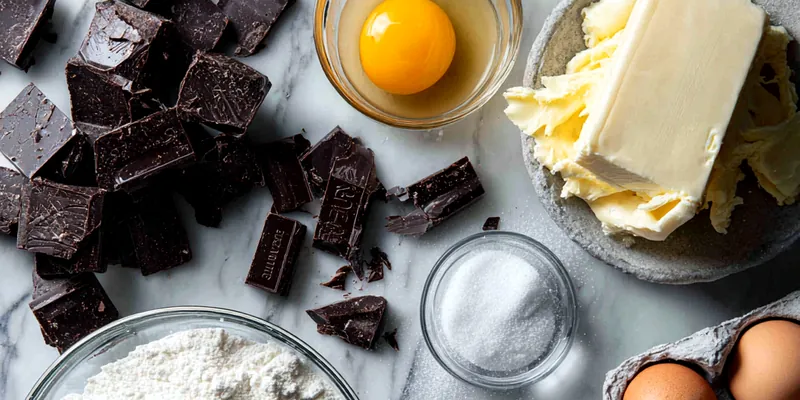
Choosing the Right Ingredients for Fudgy Perfection
The quality of your chocolate ingredients makes or breaks these brownies. Use a high-quality unsweetened cocoa powder—Dutch-processed cocoa creates a deeper, more sophisticated chocolate flavor with less acidity, while natural cocoa provides a brighter, more intense chocolate taste. Both work beautifully, so choose based on your preference. Avoid cocoa powder that's been sitting in your pantry for years, as it loses potency over time. Fresh cocoa should smell richly chocolatey, not dusty or faint.
Butter quality is equally important since it's a primary ingredient. Use unsalted butter so you can control the salt level precisely. European-style butter with higher fat content creates an even richer, more velvety texture. For the cream cheese layer, always use block-style cream cheese, never the spreadable kind from a tub. The spreadable versions contain additives that prevent proper setting. Philadelphia brand consistently delivers the best results with its smooth, tangy flavor and perfect consistency that holds up during baking.
Essential Ingredient Notes
- Cocoa Powder: Choose unsweetened cocoa powder labeled 'Dutch-processed' for mellow, earthy chocolate flavor, or 'natural' for brighter, more acidic notes. Sift before measuring to remove lumps and ensure accurate measurement. Store in an airtight container away from moisture and heat.
- Cream Cheese: Use full-fat block cream cheese at room temperature—it should be soft enough to leave an indent when pressed but still hold its shape. Let it sit out for 1-2 hours, or microwave in 10-second bursts. Beat thoroughly before adding other ingredients to ensure no lumps remain.
- Butter: For the brownie batter, melt the butter completely and let it cool for 5 minutes before mixing with sugar to prevent cooking the eggs. For the frosting, butter should be at cool room temperature—soft enough to mix easily but still holding its shape. This creates the best frosting texture.
Mastering the Layering Technique
The secret to picture-perfect layers lies in understanding how different batters behave when baked together. The brownie batter is dense and heavy, while the cream cheese mixture is lighter and more fluid. By spreading exactly half the brownie batter first, you create a stable foundation that's thick enough to support the cream cheese without allowing it to sink. The cream cheese layer itself should be thick and spreadable—if it's too liquid, it will seep through. If it's too stiff, it won't spread evenly and may create gaps.
When adding the final brownie layer, patience is key. Rather than pouring it all at once, which would break through the cream cheese, drop spoonfuls evenly across the surface first. Then use an offset spatula to gently spread outward from each dollop, encouraging them to meet in the middle. This technique prevents disturbing the cream cheese layer below. Some people like to create intentional swirls by dragging a knife through the layers once—this is entirely optional and creates a beautiful marbled effect, though it does sacrifice some of the clean layer distinction.
The Perfect Brownie Texture
Achieving that coveted fudgy texture requires precise mixing and baking. When combining wet and dry ingredients, fold gently just until no dry flour streaks remain—overmixing develops gluten and creates a cakey texture. The batter should be thick, glossy, and flow slowly from the spoon. During baking, watch for the tell-tale signs of doneness: edges pulling away from the pan, a papery top forming, and that crucial slight jiggle in the center. A toothpick test should yield moist crumbs, not wet batter or come out clean. Trust these visual cues over timing, as oven temperatures vary.
Cream Cheese Swirl Brownies with Chocolate Frosting
📋 Ingredients
Brownie Layer
- 8 ounces cream cheese, softenedMust be room temperature and block-style, not spreadable
- ⅓ cup granulated sugarSweetens and helps create smooth texture
- 1 large eggBinds the cream cheese layer
- ½ teaspoon vanilla extractEnhances the cream cheese flavor
Cream Cheese Swirl
- 1 cup unsalted butter, meltedCreates rich, fudgy texture; let cool slightly before using
- 2 cups granulated sugarProvides sweetness and helps create shiny top
- 4 large eggsRoom temperature works best for smooth mixing
- 1 tablespoon vanilla extractPure vanilla extract tastes best
- ¾ cup unsweetened cocoa powderDutch-processed or natural both work; sift before measuring
- 1 cup all-purpose flourSpoon and level for accurate measurement
- ½ teaspoon saltEnhances chocolate flavor
- ½ teaspoon baking powderCreates slight lift without making them cakey
Instructions
Prepare Brownie Batter
Preheat oven to 350°F (175°C). Line a 9x13-inch baking pan with parchment paper, leaving overhang on sides for easy removal. In a large bowl, whisk together melted butter and sugar until combined and slightly cooled. Add eggs one at a time, whisking well after each addition. Stir in vanilla extract. In a separate bowl, sift together cocoa powder, flour, salt, and baking powder. Fold dry ingredients into wet ingredients until just combined—do not overmix. The batter should be thick and glossy.
Make Cream Cheese Layer
In a medium bowl, beat softened cream cheese with an electric mixer on medium-high speed for 2-3 minutes until completely smooth and fluffy with no lumps. Scrape down the sides of the bowl. Add sugar and beat for another minute until well incorporated. Add egg and vanilla extract, beating on low speed just until smooth. Do not overmix once the egg is added.
Layer and Bake
Pour exactly half of the brownie batter into the prepared pan, spreading it evenly to all corners with a spatula. Dollop the cream cheese mixture over the brownie layer in several spots, then carefully spread it to create an even layer, leaving a small border around the edges. Drop spoonfuls of the remaining brownie batter evenly over the cream cheese layer, then gently spread to cover completely. Optional: Use a knife to create one or two swirls through the layers. Bake for 35-40 minutes until edges are set and center has only a slight jiggle. Do not overbake. Let cool completely in pan on a wire rack, at least 2 hours.
Prepare Chocolate Frosting
In a large bowl, beat softened butter with an electric mixer until creamy and smooth, about 1 minute. In a separate bowl, sift together powdered sugar and cocoa powder. Gradually add the cocoa mixture to the butter, alternating with heavy cream (start with 3 tablespoons). Add vanilla extract. Beat on low speed until combined, then increase to high speed and beat for 3-4 minutes until light, fluffy, and spreadable. Add more cream if needed for desired consistency.
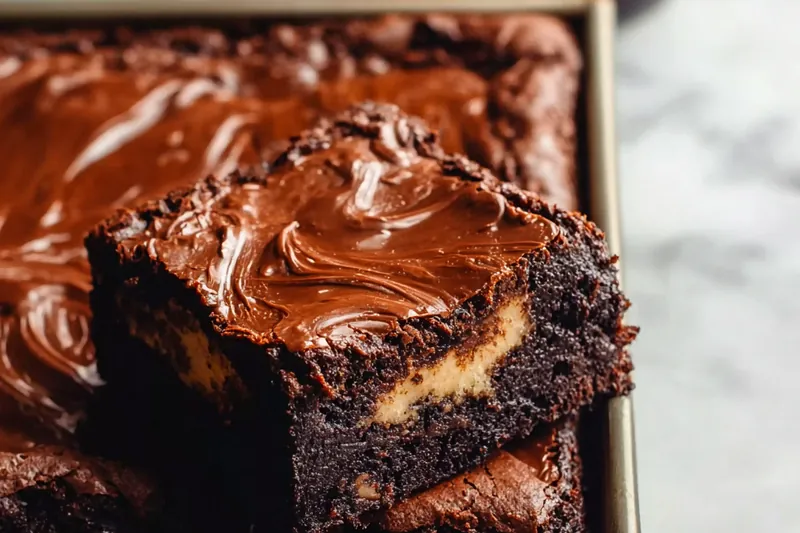
Frost and Serve
Once brownies are completely cooled, spread chocolate frosting evenly over the top using an offset spatula. Create decorative swirls by moving the spatula in circular motions. Refrigerate for at least 30 minutes to set the frosting. Using the parchment paper overhang, lift the entire brownie slab from the pan and place on a cutting board. Cut into 16 squares (4x4 grid) using a large sharp knife, wiping the blade clean and dipping in hot water between cuts for the neatest edges. Serve chilled or at room temperature.
Recipe Notes & Tips
Storage
Store brownies in an airtight container in the refrigerator for up to 5 days due to the cream cheese layer. Let sit at room temperature for 15-20 minutes before serving for best texture. Can freeze unfrosted brownies wrapped tightly for up to 3 months.
Serving Suggestions
Serve with vanilla ice cream, fresh berries, whipped cream, or a glass of cold milk. These are rich, so one brownie is satisfying! Perfect for potlucks, bake sales, or special celebrations.
Variations
Add ½ cup chopped walnuts or pecans to the brownie batter. For mint chocolate brownies, add ½ teaspoon peppermint extract to the cream cheese layer. For a boozy twist, add 1 tablespoon coffee liqueur to the brownie batter. Try swirling in caramel sauce along with the cream cheese for salted caramel brownies.