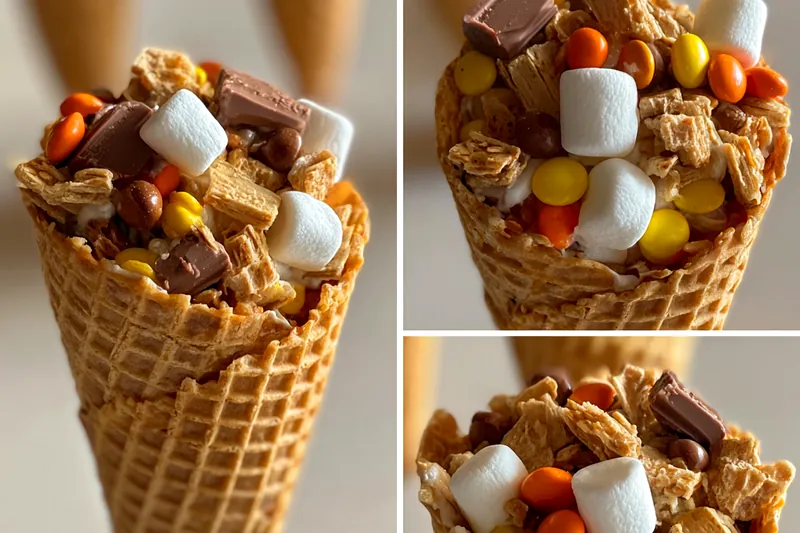
Chocolate Marshmallow Candy Cones
Chocolate Marshmallow Candy Cones are a delightful treat that brings together the rich flavors of chocolate and fluffy marshmallows. Perfect for parties or a sweet family dessert, these cones are sure to please everyone. Easy to make and fun to eat, they are a unique twist on traditional desserts. Let's dive into the delicious world of Chocolate Marshmallow Candy Cones!


Why This Chocolate Marshmallow Candy Cones Recipe Works
This recipe works because it combines contrasting textures and flavors, creating an unforgettable dessert experience. The crunchy exterior of the cone pairs perfectly with the creamy chocolate and soft marshmallows, giving each bite a delightful surprise.
The technique of melting chocolate with heavy cream ensures a silky chocolate mixture, while the addition of marshmallows adds a fun and chewy element that kids and adults alike will love. Refrigerating the cones helps set the flavors beautifully, enhancing the overall tasting experience.
💡 Professional Tip
For the best results, use high-quality chocolate chips and fresh marshmallows. This will elevate the flavors and ensure a creamy texture. If you want to customize the recipe, try adding different toppings like crushed candy bars or seasonal sprinkles.
Frequently Asked Questions
Yes, you can prepare the Chocolate Marshmallow Candy Cones a day in advance. Assemble the cones, fill them with chocolate and marshmallows, and store them in the refrigerator. Just add the whipped topping right before serving to keep it fresh.
You can substitute heavy cream with coconut cream for a dairy-free version, or use half-and-half if you want a lighter option. However, the texture and richness may vary slightly, so keep that in mind while making your cones.
The cones are done when the chocolate mixture has cooled and slightly thickened after filling. If the cones are well-packed with the chocolate-marshmallow mixture and the topped whipped cream is firm, you are ready to enjoy them!
It’s not recommended to freeze the cones, as the texture may change when thawed. However, you can freeze the chocolate-marshmallow mixture and fill fresh cones later when you are ready to serve.
These cones pair well with a scoop of vanilla ice cream or a drizzle of chocolate sauce on the side. Fresh fruit like strawberries or bananas also makes a great accompaniment, adding a refreshing balance to the sweetness.
Chocolate Marshmallow Candy Cones can last in the fridge for up to 3 days. Make sure to keep them covered to maintain their freshness and prevent them from drying out.
Yes, you can assemble the cones and fill them with the chocolate-marshmallow mixture, then store them in the fridge the day before serving. Just add the whipped topping right before serving for the best texture.
If you want to warm the chocolate filling slightly, you can microwave the cones for about 10-15 seconds. Be careful not to overheat, as that can melt the cone. Enjoy them warm, or serve them cold as per your preference.
Recipe Troubleshooting Guide
Too Dry
Problem: The chocolate filling may become dry if overcooked or if the chocolate chips are of poor quality.
Solution: To fix this, ensure you do not overheat the chocolate mixture, and use high-quality chocolate chips for a smoother consistency.
Not Crispy Enough
Problem: If the cones are not crispy, it may be due to moisture exposure or improper baking.
Solution: Store the cones in a cool, dry place and avoid filling them too early to keep them crunchy.
Overcooked
Problem: Overcooking can lead to burnt chocolate, which affects flavor.
Prevention: Always melt the chocolate over low heat and stir frequently to achieve a smooth consistency without burning.
Undercooked Center
Problem: The center of the cones may not set properly if the chocolate mixture is too warm.
Recovery: Allow the filled cones to chill adequately in the fridge so that the chocolate filling firms up before serving.
Burnt Exterior
Problem: Burnt exteriors can happen if cones are left in the oven too long.
Prevention: Keep a close eye on them while baking and always follow the recommended baking times.
Flavor Balance
Too Sweet: If the cones are too sweet, add a pinch of salt to the chocolate mixture to enhance other flavors.
Too Salty: If too salty, balance by adding more chocolate or whipped topping.
Bland: For bland cones, try adding more vanilla extract or a sprinkle of cinnamon to the chocolate mixture.

Essential Ingredients for Chocolate Marshmallow Candy Cones
The key ingredients for Chocolate Marshmallow Candy Cones include high-quality chocolate chips, fresh mini marshmallows, and crunchy sugar cones. Each element plays a vital role in achieving the perfect balance of flavors and textures in your dessert.
Make sure to use fresh ingredients to elevate the taste of your cones. The quality of chocolate directly affects the creaminess of the filling, while fresh marshmallows contribute to the overall fluffiness.
Essential Ingredient Notes
- Chocolate Chips: Using semi-sweet chocolate chips allows for a rich flavor without being overly sweet. Opt for a name brand to ensure quality and smooth melting.
- Mini Marshmallows: Fresh mini marshmallows will give your cones a delightful chewiness. Avoid stale marshmallows, as they can affect the texture of the filling.
- Sugar Cones: Choose high-quality sugar cones that are sturdy enough to hold the filling without breaking. A crunchy cone adds that satisfying texture that complements the soft filling.
Step-by-Step Cooking Process
The cooking process for Chocolate Marshmallow Candy Cones involves melting chocolate, mixing in marshmallows, and filling the cones with the delicious mixture. Each step is straightforward and ensures a delightful treat.
Achieving perfect results comes down to the cooling process and proper assembly. By chilling the filled cones, you allow the flavors to meld beautifully, resulting in a decadent dessert everyone will love.
Key Technique for Perfect Chocolate Marshmallow Candy Cones
The most important technique for these cones is the gentle melting of chocolate with cream. This creates a smooth, velvety filling that enhances the overall sweetness and texture of the dessert.
Chocolate Marshmallow Candy Cones
📋 Ingredients
Main Ingredients
- 1 cup butterRoom temperature
- 1 cup heavy creamFor whipped topping
- 1/2 cup powdered sugarFor sweetness
- 1 tsp vanilla extractFor flavor
- 1/4 cup chocolate syrupFor drizzling
For the Sauce
- 2 cups mini marshmallowsFor filling
- 1 cup semi-sweet chocolate chipsMelting chocolate
- 1 cup heavy creamFor rich filling
- 1 cup crushed graham crackersFor base
- 6 sugar conesFor structure
- 1/2 cup powdered sugarFor sweetness
- 1 tsp vanilla extractFor flavor
- 1/4 cup butterMelted for base
- 1/4 cup chocolate syrupFor drizzling
- 1/2 cup chopped nuts (optional)For topping
- 1/2 cup sprinkles (optional)For decoration
Instructions
Prepare the Chocolate Mixture
In a saucepan, heat heavy cream until just simmering. Remove from heat and add chocolate chips, stirring until melted and smooth.
Mix Marshmallows
Add mini marshmallows to the melted chocolate mixture and stir to combine. Let it cool slightly.
Prepare Cones
In a separate bowl, combine crushed graham crackers and melted butter. Press the mixture into the bottom of each sugar cone.
Fill the Cones
Carefully fill each cone with the chocolate-marshmallow mixture, packing it in gently.
Chill
Drizzle chocolate syrup on top and sprinkle with nuts or sprinkles if desired. Place cones upright in a container and refrigerate for 30 minutes.
Make Whipped Topping
In a mixing bowl, beat heavy cream until soft peaks form. Gradually add powdered sugar and vanilla extract, then beat until stiff peaks form.
Top the Cones
Remove cones from the fridge and pipe or spoon whipped topping onto each cone.
Serve
Serve immediately or keep refrigerated until ready to serve. Enjoy your delicious Chocolate Marshmallow Candy Cones!
Recipe Notes & Tips
Storage Tips
Store the Chocolate Marshmallow Candy Cones in an airtight container in the refrigerator. They will stay fresh for up to 3 days. Avoid stacking them to prevent the whipped topping from getting squished.
Serving Suggestions
Serve the Chocolate Marshmallow Candy Cones chilled with a drizzle of chocolate syrup and a side of fresh fruit. They also pair well with a scoop of vanilla ice cream for an extra indulgent treat.
Recipe Variations
You can customize these cones by using different types of chocolate, such as dark or white chocolate. For a twist, try adding flavored extracts or different toppings like coconut flakes or caramel drizzle.