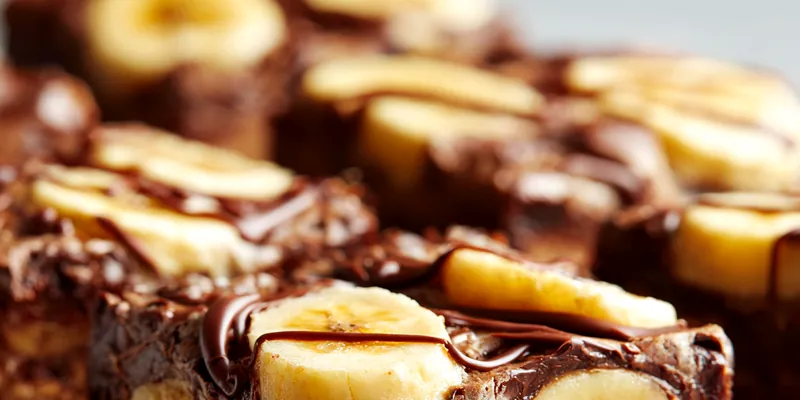
Chewy Chocolate Banana Bars
These Chewy Chocolate Banana Bars are a delicious twist on traditional banana bread. Packed with chocolate and made from wholesome ingredients, they offer a delightful snack or dessert option. Easy to prepare, they are perfect for those craving something sweet yet healthy.

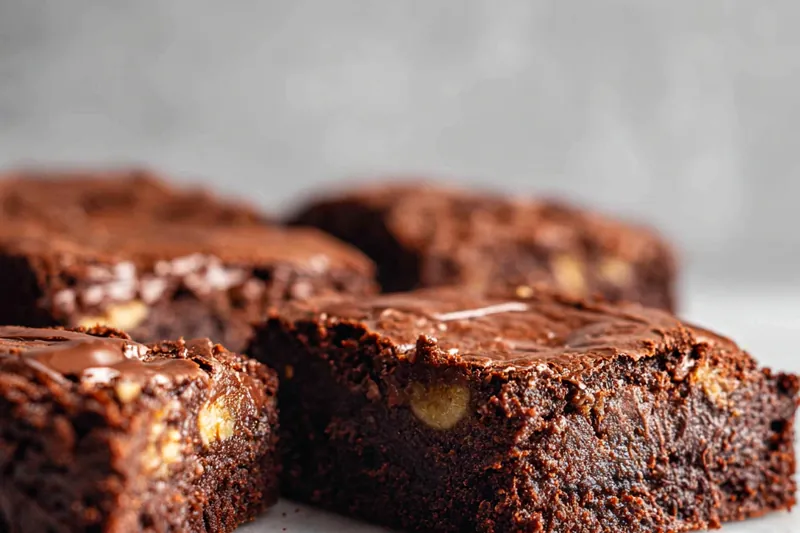
Why This Chewy Chocolate Banana Bars Recipe Works
This recipe utilizes ripe bananas for natural sweetness, reducing the need for added sugars. The addition of whole wheat flour and oats provides a nutritious base, making these bars more satisfying. Baking at the right temperature ensures they remain chewy and delicious.
The rich cocoa powder and chocolate chips elevate the flavor, making these bars irresistible. They strike the perfect balance between sweet and chocolaty, satisfying those with a sweet tooth without the guilt. This makes them a great option for both kids and adults alike.
💡 Professional Tip
For extra moisture, make sure to use very ripe bananas. You can also substitute the coconut oil for applesauce for an even healthier version, retaining the chewiness.
Frequently Asked Questions
Yes, you can make these bars ahead of time. They can be stored in an airtight container for up to 3 days, making them a convenient grab-and-go snack.
You can use coconut sugar or a 1:1 sugar substitute in place of brown sugar. If you prefer less sweetness, you can also reduce the amount of sugar used in the recipe.
The bars are done when a toothpick inserted into the center comes out clean or with a few moist crumbs. The edges should start to pull away from the sides of the pan.
Absolutely! These bars freeze well. Wrap them individually in plastic wrap and store them in a freezer-safe bag for up to 3 months.
You'll need a mixing bowl, a whisk, a baking pan, and a spatula. A non-stick spray or parchment paper for lining the pan is also recommended.
These bars are great on their own, but you can serve them with a side of yogurt or a glass of milk for a balanced snack. They also pair well with fresh fruit for added freshness.
This recipe doesn't have a spice level, but you can add a pinch of cinnamon or nutmeg for warmth. Adjust according to your taste preferences.
Store leftover bars in an airtight container at room temperature for up to 3 days. For longer storage, refrigerate or freeze them as needed.
Recipe Troubleshooting Guide
Too Dry
Problem: Your bars may be dry if overbaked or if too much flour was added.
Solution: To fix this, make sure to check for doneness a few minutes before the suggested baking time. If the mixture seems thicker than expected, reduce flour slightly next time.
Uneven Cooking
Problem: This can happen if the oven temperature is inconsistent or if the batter is not spread evenly.
Solution: Ensure your oven is calibrated correctly and spread the batter evenly in the pan for uniform baking.
Lacking Flavor
Problem: If your bars taste bland, it may be due to insufficient ingredients or flavoring.
Prevention: Add a pinch of salt and consider incorporating vanilla extract or spices to enhance the flavor profile.
Wrong Texture
Problem: Bars may end up too crumbly if not enough moisture is present.
Recovery: Add a little more mashed banana or a splash of milk to the batter to achieve the desired moisture level.
Overcooked
Problem: Overcooking can lead to a dry texture and loss of chewiness.
Prevention: Keep an eye on the baking time, and perform the toothpick test to avoid overbaking.
Flavor Balance
Too Sweet: If the bars are too sweet, reduce sugar in future batches or add a pinch of salt to balance the sweetness.
Too Salty: If too salty, consider using unsalted ingredients next time to control the salt content.
Bland: Adding chocolate chips or nuts can enhance flavor and texture if the bars taste bland.
Choosing the Best Ingredients
Selecting ripe bananas is crucial for natural sweetness and moisture. Look for bananas with brown spots, which indicate ripeness, ensuring the best flavor in your bars.
Use high-quality cocoa powder for a rich chocolate flavor. Ensure your flour is fresh and check for any lumps before mixing to achieve a smooth batter.
Essential Ingredient Notes
- Ripe Bananas: Choose bananas that are very ripe for optimal sweetness and moisture. The more brown spots, the sweeter and more flavorful they will be.
- Cocoa Powder: Use unsweetened cocoa powder for an intense chocolate flavor without added sugars. Look for organic options for better quality.
- Chocolate Chips: Opt for semi-sweet chocolate chips for a classic flavor. Dark chocolate works well too, adding a richer taste to the bars.
Cooking Technique Tips
Mixing the wet and dry ingredients properly is key to achieving a consistent batter. Avoid overmixing to prevent tough bars; mix just until combined.
Baking at the right temperature ensures the bars are cooked evenly. Allow them to cool completely before cutting to maintain their chewy texture.
Chef's Secret Technique
To boost moisture, reserve a small amount of banana to mash and fold into the batter just before baking. This trick ensures extra chewiness and richness.
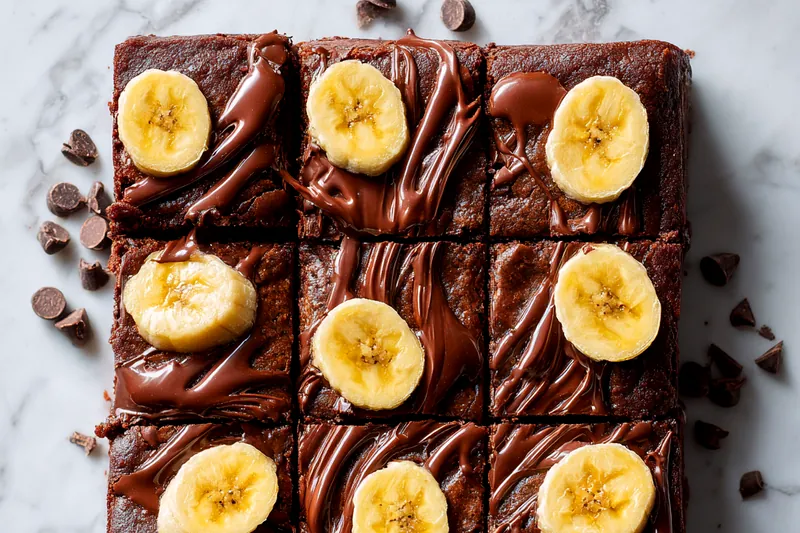
Chewy Chocolate Banana Bars
📋 Ingredients
For the Base:
- 1 cup ripe bananas💡 The riper, the sweeter!
- 1/3 cup melted coconut oil💡 For moisture and flavor
For the Flavor:
- 1/2 cup brown sugar💡 Adds sweetness and moisture
- 1 cup whole wheat flour💡 For a healthier twist
Instructions
Step 1: Preheat Oven
Preheat your oven to 350°F (175°C) and grease a 9x9 inch baking pan to ensure easy removal.
Step 2: Mix Wet Ingredients
In a large bowl, mix the mashed bananas with melted coconut oil until well combined.
Step 3: Add Sugar
Add brown sugar to the banana mixture and stir until smooth, ensuring no lumps remain.
Step 4: Sift Dry Ingredients
Sift together the whole wheat flour, cocoa powder, oats, baking powder, and salt in a separate bowl.
Step 5: Combine Mixtures
Gradually add the dry ingredients to the wet ingredients, mixing until just combined.
Step 6: Fold in Chocolate Chips
Fold in the chocolate chips for an extra chocolaty flavor.
Step 7: Bake
Pour the batter into the prepared baking pan, spreading it evenly.
Step 8: Cool and Slice
Bake for 25 minutes or until a toothpick inserted into the center comes out clean. Let cool before slicing.
Recipe Notes & Tips
Storage
Store these bars in an airtight container at room temperature for up to 3 days. For longer shelf life, keep them in the refrigerator or freeze them for up to 3 months.
Serving Suggestions
Serve these chocolate banana bars with a dollop of Greek yogurt for a protein-packed snack. They also pair well with a scoop of vanilla ice cream for a delightful dessert.
Variations
Experiment by adding nuts or dried fruits to the batter for added texture. You can also substitute almond flour to make them gluten-free.